Friday, January 16, 2015

Lemon Honey Artichoke and Tomato Rice

For those of you who came for the recipe (thank you so much for your visit!), here it is. For those of you that came for the recipe and the story, you can scroll on down.

RECIPE:

3/4 C uncooked rice (I used Basmati)
1 C water
1/3+ C white wine (I used, like, 1/3 C plus a splash)
1 C chicken broth
5-6 T honey
1-2 T butter
1 1/2 C chopped tomatoes (I used about 10-15 cherry tomatoes cut in half, but use whatever )
6 oz frozen artichoke hearts (This is an annoying measurement, I apologize. I buy them frozen from Trader Joe's and they come in 12 oz bags and I used half the bag. I imagine it would work with canned ones or more, or less, or whatever)
Dash of salt (okay like 4 dashes)
Ground pepper for topping

1. Place rice, water, wine, chicken broth, honey, and butter in a pot and turn the heat on high.
2. Once it reaches a boil, turn the heat down to medium and cover. Let simmer.
3. Once you can start to see some rice peeking out from the liquid, toss in the tomatoes. Lightly mix.
4. Now run your frozen artichoke hearts under warm water for like 30 seconds-1 minute in a colander. Then, add them in.
5. Cook until there seems to be a sauce on the rice, but that the rice isn't, like, swimming in sauce or something like that. It's a moist rice dish, you don't want to over cook it, but also you don't want it soupy. You should know by looking, and if not, well, trial and error. Do make sure the rice is appropriately tender, if you aren't sure.
5. Plate, grind the pepper on top, and enjoy.

I had this as a meal by itself but it would be delicious alongside some chicken, or under some chicken, or on top of some chicken...I'm saying you should pair it with chicken, but the sky's the limit, really.

Behold: a food photo not taken on a wooden or white counter top, in perfect sunlight! #impatient


Okay now for the story.

So I was on my own for dinner tonight and while I was driving home I was thinking about the frozen artichokes in the …well, in the freezer. And I was wanting to use them but not sure how to cook them, as I've never purchased frozen artichokes before. And then I thought about how I could use them with rice and started thinking about whether I could steam them while I cooked the rice, or, something, and then I thought about this place where I love to eat in Baltimore. It's called Bertha's Mussels. Here's the thing, though, I don't like mussels, so I've never ordered them, but I absolutely love this shrimp dish called Shrimp Maurice. That's where I got the idea for the rice, because this dish has a delicious lemon/honey/butter/wine sauce on it. Well, I decided to just attempt to make it up. So I got home and actually, you know, looked at the package of artichoke hearts and lo and behold! They have directions. You can, in fact, boil them in a little bit of water in a saucepan, so I decided to just add them at the end of the rice, as it says to do so above. So I did and I was pretty nervous, I mean, I just squirted some honey, spilled some wi...added. Added some wine to the pan (kidding, wine was so obviously needed…), and hoped for the best. Well, not to brag, but it was delicious. The consistency was great and the flavor was awesome; filling but not heavy. I am so excited about this dish I dug up my super old food blog!!!! RIGHT?!?! YES?!?! Anyway enjoy and  be creative! Let me know if you think of changes or complete meals for this! (I suggest chicken. Oh right, I said that.)

Friday, June 28, 2013

Whole, Roasted Artichoke

What on earth does one do with this mysterious vegetable?

YOU DEVOUR IT LIKE IT IS NEW YORK CITY AND YOU ARE THE HULK AFTER YOUR FILET MINON WAS SERVED MEDIUM WELL INSTEAD OF MEDIUM.

Small backstory. 

I have known I liked artichokes and I've even known how to eat some of them for as long as I can remember. My mom would boil them. Here's the issue with that: you don't really know how long they need to boil for and when was boiling ever preferred to roasting? Never.

Step one, cut off the stem. If you can cut it off so that it makes a flat place for the artichoke to stand on, great.

Now, cut off the top of the leaves. Just estimate. Not more than about the top 1/4, but you can judge. Now move it to a sheet of aluminum foil, enough to wrap it up into a bundle later.

Squeeze lemon onto the center and down into the crevices. Look at that perfect droplet…

Maybe drizzle some Oil of Olive. The extra card holder is best. (Card holder = virgin, for those of you who missed that.)

Salt and pepper.

Butter. 

Now wrap it up in a perfect little artichoke package of deliciousness. Put it in a 350º oven for about an hour.

Take it out, unwrap, and attempt to wait a few, until its handle-able. 

LOOK AT THIS.

I meant to take pictures of the leaves so you can see *how* to eat it, but, I got distracted by eating it. Basically, you just slide the "meat" off the leaves, just on the tips at the bottom. 

When you get to the center, the leaves will become super pale and impossible to eat. Just tear those off. Then you'll see this hair.

It's not really hair.

Dig it out, cast aside.

Once you dig it out, you'll have the center. I eat all of this part. It's the "artichoke heart" you hear so much about, you know, always hooking up with spinach and going for a dip.


I love this. It is super healthy, takes a while to eat, and is just flat delicious. It's a great alternative to the normal vegetables. 

Oh remember when I was talking about boiling it? Yeah. When you do that, you have to dip the bottoms of the leaves in melter butter, and I've even heard of people dipping it in mayonnaise  This method eliminates that step. The leaves are very flavorful. In fact, I'm going to go make one right now. For the third night in a row. 

I feel cleansed from the meatloaf now. 


Monday, June 24, 2013

My Adventures in Meatloaf

Hey guys. Been a long time. Here are some excuses reasons:

1. For a while, I was actually really sucking it up in the kitchen. I got way consumed with other things and just wasn't doing much there in the creative department. I had another  creative outlet. I opened an Etsy shop, called Etched Heart. I design word art, greeting cards, bookmarks, lots of stuff! So my need to be creative in the kitchen was lessened. But now I'm back.

Two weeks ago I spent Sunday afternoon making a gigantic quantity of food. I made brown rice with onions and peppers, quiche, and salads in a jar. I should make a blog post about salads in a jar. Okay fine here's an overview:


This is a bad picture because the jar is frosty, having been in my fridge. This is a concept recipe, as usual.

1. Dressing on bottom.
2. Heaviest toppings next, like meat, broccoli, carrots, peppers, tomatoes. Ones that will still taste good having sat in dressing. Continue with those in layers, then nuts and cheese above them (this is not that important, it's just what I always do).
3. Lettuce on top, far from the dressing. STUFF YOUR JAR FULL OF LETTUCE. The less air, the better. 

Rules of salad jar eating:
1. One does not shake the jar to instantly go from a lovely, layered, pinteresty meal to a perfectly blended salad in a jar. No. You must dump it onto a plate. Here's how mine looked: 


Oh and yes that is the quiche I spoke of earlier, and let me tell you. Normally I could take or leave the crust, but pictured is the roll out pie crust from Trader Joe's and if anyone tries to take it from me, I will leave them with so many evil glares they will be paranoid for the rest of their life. (So, it's good pie crust.) 

So, meatloaf. 

First, some rambling a story. 

I don't like meatloaf. I, as you might recall, have also decided I don't really love processed food but also realize that sometimes we 
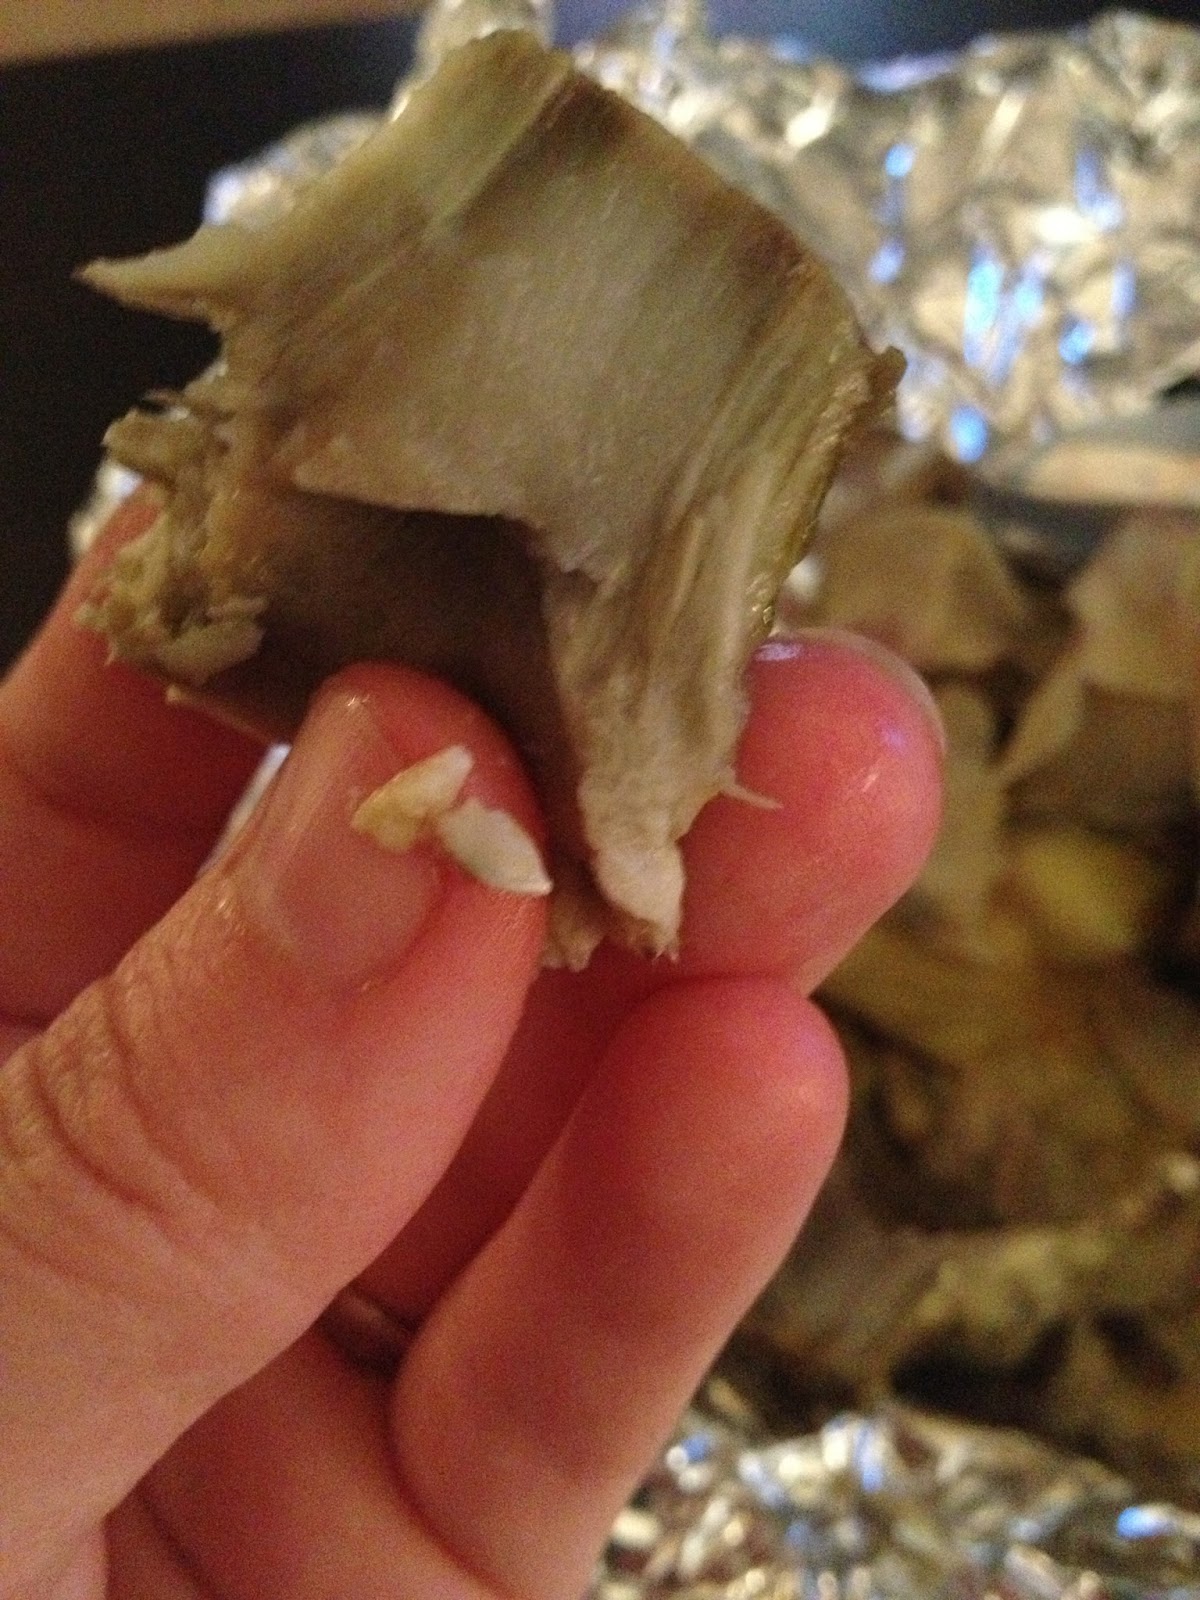
have to be realistic. So, the meal above, you see, was my lunch. I made Husband some homemade pizzas (flatbread, sauce, cheese, pepperoni, oven. Look out!). For dinner that night I had whole wheat flatbread with avocado spread on it and a tomato cut up on top with black pepper, and also an entire roasted artichoke (so amazing, I literally tore it up [and if you've ever eaten artichoke, you know that I used the accurate meaning of the word 'literally']). For him, I took tortellini Alfredo with chardonnay apple chicken sausage and shaved parmesan on top. Yeah. I just decided I can't eat like he does, and he won't eat like I do, so…until we have children, the 2 meal thing is fine. But you see, I aim to please my sweet husband, and though he actually has excellent taste in food, he is also quite capable of enjoying the NASCAR of foods (not that a good box of Velveeta was ever passed on by me, but, you know). So in my endless efforts to be the best wife ever, I decided to tackle one of my most hated entities: meatloaf. But I had 2 goals!!!!!!!!!! 1. That my meatloaf would NOT be dry and 2. That Husband would like it. 

"Why do you hate meatloaf, Cari?"

Here's why. 

1. Why would you ever put the word "loaf" next to the word "meat?" Gross. 
2. I really don't go bananas over ground meat in general, I mean, I love tacos but that's a much smaller quantity, and meatballs can be delicious but somehow balls of meat is less gross that a loaf of meat in my mind. 
3. Gross, I just think it's gross. And listen! Disclaimer. If you have me over and serve me meatloaf, you will not know that I don't like it. I will eat it and say thank you and you don't have to worry about catering to me. 

So whatever, I don't like meatloaf. But when I called Josh and left a message asking for his sauce of choice for meatloaf, he called back and sounded just like the dog on the Beggin' Strips commercias. Bacon???? Meatloaf????? Yes. The same. So though my soul was sad to be making this monstrosity, my heart was happy to please my husband. 

But of course you KNOW I did not slather ketchup on top of some weakly seasoned meat and call it a day, right? 

Of course not. 

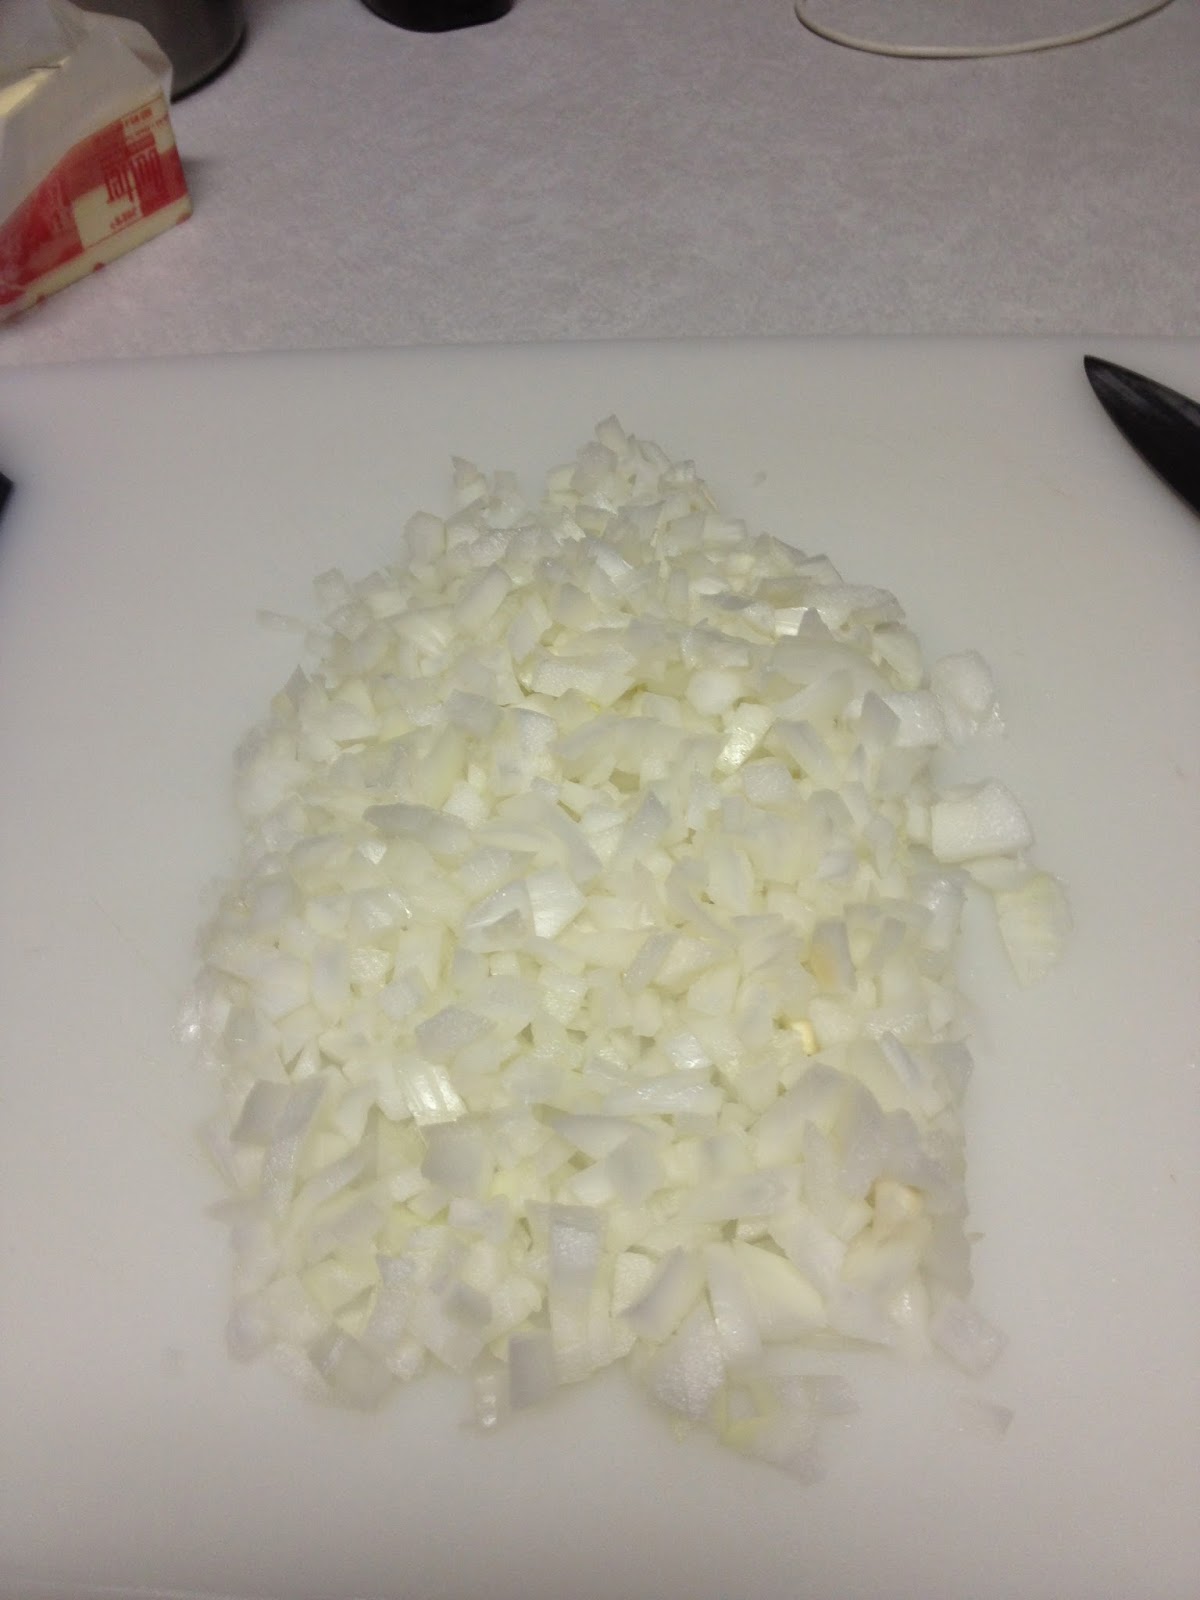
Here are my ingredients, minus the onion which I'd already chopped. 


Now listen, meatloaf is really also a concept recipe. Here's the basic steps.

1. Mash up meat, small amount of sauces, eggs, breadcrumbs, and seasonings. 
2. Mash it into a loaf pan.
3. Say 3 Hail Mary's and 5 Our Father's and perhaps you'll be forgiven (I'm not Catholic and I don't think making meatloaf requires forgiveness, just laugh and move on.) 
4. Slather some sauce on top. Ketchup if you must. Something else if you can.
5. Bake it at 350 for 1 hour. 

Want to go Italian? Use italian seasonings, parmesan cheese, maybe stuff it with mozzarella like I did, and top with quality marinara sauce. Maybe add some pepperonis as you are probably serving this to a severe carnivore. 

Southern BBQ? Get your BBQ sauce of choice and season that meat with chili sauce, cayenne, onions, and lots of black pepper. Oh, and bacon. Probably bacon.

Southwestern/Tex Mex? Use jalapeños, cheddar, and green chiles. Slather with taco sauce or enchilada sauce. I'm sure they wouldn't say no to bacon, either. 

But here's what I did.

 I chopped slightly more than 1/2 an onion.

 I melted butter in the pan so I could sauté the onion.

 Oh, I also had my ~2 lbs of meat sitting out so that they wouldn't be so darn cold when I went to mix everything with my hands. I used a combination of "meatloaf" meat (yes this grossed me out), but all that is is a combination of pork, veal, and beef, and added some extra beef to fill it out.
 I put breadcrumbs in the bow, and poured them out, because I forgot to beat the eggs. 

 There, I beat the eggs. I added a splash of milk. 

 I stopped cooking the onions when they looked like this. 

 I added this crap to the meat (except the chili sauce from Trader Joe's that is not crap.)

 Then I added this, because mustard. 

 Then I sprinkled it with parmesan, because Husband.

I also added cracked pepper, sea salt, cayenne, and then the onions.

 Then I greased my loaf pan and highly doubted it would all fit and instantly began planning to make meatballs with the leftover.

 Then I mixed it up and filled half the loaf pan, then I added 2 sticks of mozzarella 
(this is real mozzarella, not string cheese)

 Then, to my great surprise, the rest of it all fit on top.

 Now, slather time, I used Jack Daniels Honey Smokehouse sauce to make Husband happy.

 Then, I put bacon on top. Now I saw pictures of these meatloaves with super crispy awesome bacon on top that they claimed would cook like that if you just put it on top and left it in the oven, uncovered, for an hour. I was doubtful, but didn't care, because why wouldn't he want extra bacon fat anyway?

 But the bacon looked gross so I cracked some pepper on top. Much better.

Then I waited an hour. Oh, and the oven was on 350. So I waited an hour and made mashed potatoes, cleaned the house, mourned my arteries, and finally it was time to take it out.

Remember my 2 goals? 1. NOT DRY 2. Husband likes.


 Goal #1 was successful. It was not dry. 

But as suspected, the bacon on top caused a lot of extra liquid. 

So I poured the fat out and sliced it and it fell apart, but who cares, it wasn't dry. The cheese was good and the bacon was okay but definitely not crispy, but did add a nice flavor.


So these were our complete meals. I ate the meatloaf because I had, after all, spent all that time and used ingredients I could tolerate, and though I would say it was "good meatloaf," I still really did not like it and will not eat any more of it.

As for goal #2? Yes, Husband liked it. He also liked the mashed potatoes but there's nothing special about how I made those (use cream cheese, mash with a masher, not with an electric mixer) so it's not worth a post. Now Husband has leftovers and I can check off "meatloaf" on the list of domestic duties. 

Seriously meatloaf is gross. 


Wednesday, January 16, 2013

Fabric Softener & Wrinkle Release Spray

FANTASTIC!!!!!!!!!! Why? Because from the store it is extremely expensive.  Also I get IMMENSE satisfaction from making fabric softener because you can, from your homemade fabric softener, make HOMEMADE WRINKLE RELEASE SPRAY!!!! and also… HOMEMADE FEBREZE!!!!!!!!!!!!!!!! Admittedly, I haven't made the Febreze yet but I kind of use the wrinkle release as Febreze, but I know there are recipes for homemade Febreze which uses fabric softener.

Okay here's where I got my recipe.

Very simple. Basically 1 part conditioner, 1.5 parts vinegar, and 3 parts hot water. LET ME, HOWEVER, SHOW YOU MY TRICK.

You buy the cheapest  conditioner (and seriously Suave has some great scents but don't do nothin' for my hair -- and if you think I really speak in that manner you have clearly never met me, that is just for effect) in whatever delicious scent you want, and you dump all of it in your largest pot. Then, you fill it up 1.5 times with vinegar, and then you fill it up 3 times with water. RIGHT?!?! Oh man, so great. Here's why this is a good idea:

1. It involves dirtying minimal dishes (i.e. measuring cups which, seriously? You want to squirt conditioner into a measuring cup?)
2. None of the bottles are an even 2 cups, as the website's recipe calls for. It's either a little less or a little more than 4 cups or whatever.
3.  By using the container to measure the vinegar and the water, you will get the most conditioner possible out of the bottle.

So do that.

After you add the REALLY HOT WATER, I recommend using a whisk to mix. Now listen - I'm all about least mess, but a whisk will speed up the process and as long as yours is dishwasher safe, it's not such a pain to wash, really. Mix that junk up in your giant pot and then transfer it to a pitcher. "But Cari," you're thinking, you smart person, "why mix it in the giant pot if you're going to make me pour it into a pitcher?" Well, I'll tell you. Because your pitcher probably has a spout. And that will make it easier to transfer into bottles or mason jars or whatever (I save the coffee creamer bottles that I purchased on rare occasions. Gallons or half gallons work super well, or *gasp* YOUR OLD LAUNDRY BOTTLE OF ANY SORT!). Also, because all of it wont fit into the pitcher, so you'd have a big donkey mess (when you figure that one out, you will laugh) to clean up. Whatever, this is what I do, if you find a better way leave it in the comments. Also, just use the NORMAL AMOUNT for laundry. Like it was legit, from the store, expensive stuff. Okay picture time.


Here's my fabric softener in a pitcher. It's the first batch, lavender. It looks the right consistency, right?? Because it IS!!!


Here it is in my giant pot. See? Bubbly and perfect. Green apple this time. 


Now behold - all three of these are FULL! (Okay the one in the middle isn't *full,* but mostly. I drew the blue line where it filled up to. Here's some math. The Downy bottle contains 34 oz. The bottle on the far left (an old vinegar bottle. I buy a much bigger size now.) holds 32. Plus the one in the middle, that's at least 12 oz. So that would be 78 oz. of fabric softener made from a $1 bottle of conditioner plus 2 cups of vinegar. Um…how many syllables can you stretch "cheap" to be? Because that's how cheap this is. 

BUT WAIT, THERE'S MORE!

Wrinkle release spray. 

This crap is awesome.

So you take a teeny blob, like a teaspoon of fabric softener per CUP of water (guesstimate, people), glob it into a spray bottle and add hot water, shake, and spray the wonder all over your stuff. I use this on our bed, as we have a duvet cover which gets very wrinkled. I also freshen our sheets and pillows with it, and you could probably use this exact recipe as Febreze but there's a fuller recipe here which includes baking soda. Clearly that wont hurt anything so, go for it! I probably will be as soon as I finish these blog updates. 

  
I made both of these. I keep the big one in the bedroom and the small one in the laundry room. If you ever do that thing where you don't take your clothes out of the dryer right away, you can spritz this in there before you run the "mercy cycle" as I like to call it and you're good. ALSO -- I stopped using dryer sheets because of this fabric softener. No joke, friends. No. Joke.

Stay tuned for homemade laundry detergent next!!! 

Oh and if you aren't my friend in real life and don't enjoy reading my rambling writing for it's entertainment value deep intellect, here are the abbreviated versions:

Fabric Softener.

2 C. conditioner (any kind, I use Suave)
3 C. vinegar
6 C. SUPER HOT water

Mix (I recommend in a giant pot), pour (I recommend first into a pitcher, then…) into bottles (I recommend old laundry bottles, vinegar bottles, gallon jugs, half gallon jugs, coffee creamer containers, whatever). 

Wrinkle Release Spray

1 t fabric softener
1 C hot water

Add to a spray bottle in whatever appropriate proportions (for a 3 C spray bottle, use approx. 3 t. fabric softener). Shake. Enjoy. 

Saturday, September 22, 2012

Sweet and Savory Chicken or Turkey Meatballs in the crockpot

This was super good. I tried it out on Husband and best friend, too. They agreed.

Here is the original source I used. I modified a few things.

Ingredients:

-1 lb ground chicken or turkey
-1 egg
-1 tsp kosher salt
-1 tsp ground black pepper
-1 green apple, peeled and shredded
-1/2 c shredded sharp cheddar
-1/2 c dried cranberries
-1/4-1/2 c panko bread crumbs
-1/2 onion, sliced or diced

1. Put the ground meat in the bottom of a large-ish bowl. Since you will soon be mixing this with your hands, I recommend you leave it at room temperature for a bit so you don't have icy meat hands.

2. Put everything on top of the meat EXCEPT the onions. 

3. Get in there with your hands and mix it all together. 

4. Make ping-pong sized balls and layer them sort of staggered in your crock pot. 

5. Throw the sliced onions on top. 

6. Turn on the crockpot and wait, excitedly. Wait, though, until they have browned, which they will. 

Okay so the original recipe uses onion salt instead of fresh onion, but I didn't have any onion salt and I did have fresh onion, so that's what I did. Also the original recipe doesn't include panko bread crumbs, but I just felt like adding them so I did. I also used plain Craisins because that's what I had and they weren't too sweet. The original recipe says she was able to pull the meatballs apart and mine were more stuck together, but no one cared. I think I might have let mine cook longer than the person from the blog above, but really it was awesome. I mean maybe not ideal for sophisticated company but you could easily use this same recipe and cook them on a baking sheet if you want them to look like actual meatballs. 

Husband thinks they need some sort of tangy sauce, even though they were really good. He is like that, rarely eats meat without some moist component. If I find one, I will add it here. 

Here are my raw meatballs in the crockpot: 


Cheesy bacon chicken and potatoes in a crockpot

This recipe is awesome.

I adapted it from here - fantastic website. I love the writing style of the author as well as her recipes.

Ingredients:

-Some potatoes (I used two russet potatoes and sliced them into small circular slices and then quartered those)
-Some chicken (I used about 6 strips, but honestly breasts or thighs would work, too. I recommend using a portion that does not have bones)
-1/2 c Ranch dressing
-1/4 c Teriyaki sauce
-A hearty serving of bacon, cooked extra crispy, crumbled
-Enough shredded cheddar to cover the entire concoction

1.Wash and slice the potatoes however you'd like, toss in the bottom of the crockpot.

2. Lay the raw chicken on top

3. In a separate bowl, combine the Ranch and Teriyaki sauce. It's good, trust me. I thought it would be weird but it wasn't. Then pour it over the chicken.

4. You can put the bacon in now, or you can wait until later. It will be less crispy if you add it now, but it will give you the sensation of "hey I just put everything in the crockpot and left it and came home and it was perfection. Sweet." So, whatever suits your fancy.

5. Definitely put some cheese in at the beginning, but I would also maybe just top the finished product with some extra cheese, or throw a bit more in about 30 minutes before serving, especially if you add the bacon later, too. Either way, deliciousness is sure to ensue.

Then you just leave it, because that's the beauty of cooking in a crockpot. It's the typical high for 4-6 hours, low for 8-9 cooking time. Perfect for leftovers.

So the original recipe cited above does not include potatoes, but I'm all about a one-stop shop when it comes to the crockpot.

I can't tell you how delicious it was. I mean, the chicken tenders can be weird to cook stove-top, but they were perfect here. And the weird sauce was just tasty, just plain tasty. The potatoes I thought were perfect thinly sliced, but again, you could do whatever. You could probably even use frozen hashbrowns or maybe even frozen chicken (!!!) but I haven't tried that yet so I am unaware of the effects the extra moisture might have.

Here are some kind of gross pictures because everything is raw. Enjoy!


Monday, September 17, 2012

Re-motivated

Well, it's been forever since I've made a post but the time has come, and I have returned. So here are two easy things I've made recently and then I'll tell you what has been going on.

1. Muffcakes. Pa-muffins. Whatever.

So here's what you do, you make pancake mix (I had some Bisquick so I used that but whatever your batter is will work, I'm sure)  and then you pour it into muffin tins. One Bisquick batch made 12 muffcakes. Then you can just bake them like that, or you can add stuff. I added thawed frozen blueberries, but bacon would be a good idea, or any other fruit, or brown sugar, or whatever. Mmm, bananas? Whatever. Just put it on top, maybe push it down a bit, if you feel creative and like you have extra time you could half fill the holes, put your fun stuff, and then cover it with the rest of the batter and sprinkle some more on top, whatever. They freeze well, stay good in the fridge for several days, basically a no lose situation.

2. Chicken (and probably most meats) with any marinade and any potatoes.

I defrosted 4 chicken thighs and tossed them in the crockpot. Then I washed and cut two small-ish russet potatoes into bite size pieces and threw them in the crockpot, too. Then I threw in about 1/4-1/3 a bottle of Lawry's marinade on top and let it cook. The husband smelled it and was like WHOA, awesome. Then we both tasted it and were like, WHOAAAAA AWESOME!!!!! It was ready after 5 hours but was totally fine after 9, I cooked it on low for a while and then left it on "simmer."


Okay so here are some accompanying thoughts:

You might recall a time when I was extremely domestic and picky about what I fed my family. Well, then I left the country for 3 weeks and came back realizing we had a bit of a budget issue. Once we figured out our food budget for the month, I was like OH CRAP and so we ate grilled cheese sandwiches and PBJ's a lot for a while. Well of course that led to eating out more than necessary which obviously is bad for the budget, right? So finally I was like, OKAY ENOUGH, back to being domestic. However I realized I had to make some choices: I can't fully devote myself to all of the following: God, my husband, my music, my fitness, my house, and my cooking. There must be balance, no one can do 100% to all things or something will suffer. My relationship with God and my husband trump everything, but my house, fitness, and cooking are certainly not disconnected from God and Husband, and my music is my music, it's my calling and my service (not to mention my job) so I certainly can't just totally neglect that. So I worked some things out:

Get up and be with God first thing.

By doing this, all things in my life went better (Matthew 6:33). I had strength and motivation again to be a good care-taker of my husband and household. I desired to be a good steward of money, it wasn't a burden.

Nurture your talent.

I'm ridden with guilt when I don't have make time for my music. Obviously I teach and perform, but what about actively listening and practicing and spending time finding God's path for my music? It's important and it needs SOME time, not all the time, some time. I wrote a long thing about practicing and balance and gave it to my students. Little did they know I was speaking directly to myself as well. Holding them accountable for their practicing impacts my practicing in a positive way.

Make some realistic choices.

At this current time, I am choosing NOT to go fully unprocessed, organic, etc. Sometimes we will eat Velveeta Shells and Cheese. Sometimes (obviously, you read above) I will use Bisquick and Lawry's overly-salted marinades. Sometimes we will have to order a pizza. I will not choose homemade tortillas over sleep or practice time (obviously I wouldn't choose it over time with Husband but I am rarely in a situation where that is the case). I WILL however make wise decisions about how we spend our grocery money and making sure we have portable food. (I commute 3 hours to and from work once day a week and I take food to the Husband 4 nights a week for dinner and send him with lunch three days a week. There are 0 nights a week when he and I sit down to an evening meal together and only one day a week when we have lunch together. We hope to have one morning a week where we can have coffee together…so you see how this is weird.) I have accepted that it is okay when I eat alone to have hummus, celery, and a fried egg and to make something for Husband that grosses me out (hamburger helper, Lord forbid) for me to take him at work. This doesn't mean I think processed food is acceptable or good, it just means I have to buy groceries and not go out to eat all the time, and right now that occasionally means getting Chef Boyardee if they are on sale for $.75/can. It also means printing the Food Lion $X off of $Y spent on produce coupons like it's my job. BUT IT ISN'T MY JOB, I HAVE A JOB, and so I can't do that all the time, AND THAT'S OKAY!!!!

But the crockpot…oh, the crockpot is going to help me. I generally have time to cook, it just isn't at times that make sense. The best solution to that is the crockpot. I can even prepare something the night before, stick the whole pot part in the fridge, take it out when I get up and leave it until it reaches room temperature, and then turn the thing on and leave it so that when I get home from teaching 6 lessons in 3 different locations or whatever, I can rush some over to Husband and then come home and eat some, myself, without having to microwave or whatever. HA! YES!!! So here are two sites I'll be exploring and sharing from:

Crockpot 365

Get Crocked

I am also on Pinterest and have this board for you to see the recipes I've pinned, but I'll generally post the recipes I've actually tried on this blog. 

Blessings!

CPK